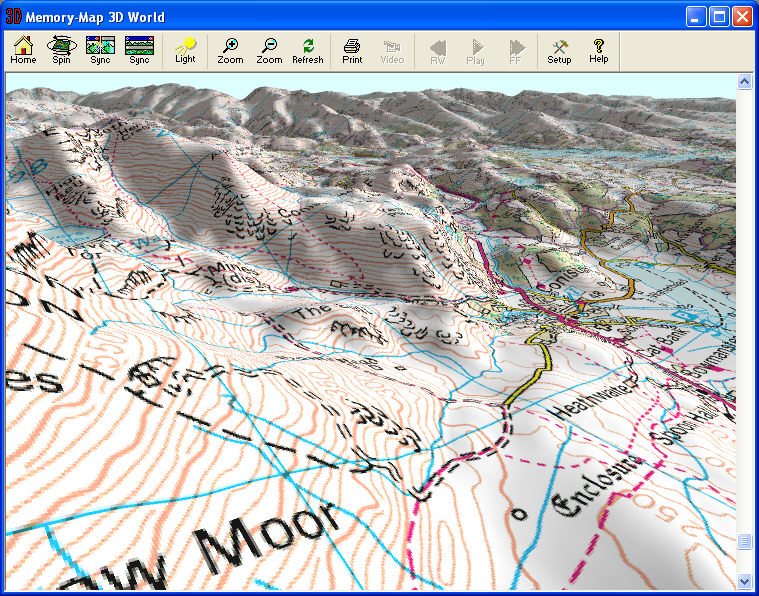
If you have a 3D graphics card with Microsoft DirectX, and you have Memory-Map's elevation data with your cartography, you can display a 3D terrain model, as shown above.
First scroll and zoom the map so the area you want to see is centered in the map window. Then click the 3D World toolbar button. A window is shown displaying the 3D model.
Alternatively, you can right-click on a route or a track in the map window, and select 3D Fly-through. This opens the 3D World window, and allows you to "Fly" along the route or track. Click the play button to view the fly-through. (Watch out! If you suffer from motion sickness, you might need one of those bags from the seat pocket in front of you!)
The 3D World works with any map, aerial photo or satellite image.
In "Spin" mode, your view is always towards the center of the terrain model. You can rotate around the model and tilt it by clicking and dragging with the mouse. You can move in and out from the center using the cursor up/down buttons, or the mouse wheel.
With the Spin button de-selected, you are free to move anywhere in the terrain model. As you move away from the center of the model, the terrain is automatically re-calculated, so you can see more detail.
Click and drag with the mouse in the 3D window to change the direction of view - up, down, left or right.
To move the viewpoint, hold down the Ctrl key and click and drag with the mouse.
To adjust your height above the terrain, use the PageUp or PageDown key.
The cursor keys perform the equivalent of dragging the mouse, and can be used with the Ctrl key to move the viewpoint.
The keyboard controls (on the numeric keypad, or the equivalent keys on a laptop) are as follows.
|
7 (Home) Faster |
8 (Up) Look Up |
9 (Pg Up) Move Upward |
- Zoom out |
|
4 (Left) Look Left |
5 Home |
6 (Right) Look Right |
+ Zoom in |
|
1 (End) Slower |
2 (Down) Look Down |
3 (Pg Down) Move Downward |
|
If at any time you become disoriented and loose sight of the model, hit the Home toolbar button or the 5 key to move to the "Home" view.
The Sync buttons allow you to view both the 2D map and the 3D view at the same. As you move about in the 3D World, the map is scrolled, and a red dot shows the location of your current viewpoint. You can arrange the windows either horizontally or vertically.
The Light button is used to adjust the direction of illumination of the model. You can put the sun anywhere by clicking the mouse.
The Zoom buttons change the field of view, just like the zoom lens of a camera.
Using the slider on the right of the screen, you can increase the apparent steepness of the terrain, to bring out subtle gradients in flatter ground. If you are viewing an area where the hills are already quite steep enough, move the slider to the bottom.
To animate the display to fly along a route or track, go back to the plain map window, right-click on a route or track, and select 3D Fly-through. When the 3D window is shown, the Play, FF/Rew and Video record buttons are enabled. Click the play button to experience the flight!
During play-back you can change the direction of view (using the mouse or the cursor keys) and the height above the ground (PageUp / PageDown). Use the Home key to speed up and End to slow down.
If you want to hide the track or route line, switch back to the plain map window, right click on the overlay and Hide. Then switch back to the 3D window and (when the terrain is next refreshed) the line will be gone.
To record a video file of fly-though, click the Video button. Enter an AVI file name in the "Save As" dialog. The window size is automatically changed to 640 by 480 pixels. Now, when you click Play, the animation is written frame by frame into the video file. You can use pause, Rew/FF and adjust the view to get exactly the sequence you desire.
To stop recording, click the Video button again.
The resulting video file is uncompressed, so it is too large for most purposes. Use Microsoft Movie Maker (bundled with Windows XP) or another video file editing package, to format the video to the size and bit-rate you need. You can combine the animation with real video, text, music and narration for a professional presentation.
As you move about in the 3D World, the model is automatically updated to give you the best detail of the terrain in front of you, and progressively less detail out towards the horizon. However, if you move quickly, you can move faster than the computer can update the model, and the map may appear grainy. The Refresh button allows you to manually refresh the view, which you might want to do, for example, before printing. The Refresh button is greyed when the computer is refreshing the terrain (which typically takes several seconds). You can still move and control the view while this is happening.
You can make a printout of the model any time using the Print button. Note that the printed image is generated at the same resolution as the on-screen image. For best results, maximize the 3D World window.
The Setup button allows you to change program options:
Map size controls the amount of data (both 3D vertices and map texture) sent to the graphics card. The small size will result in quicker refreshing of the terrain, but less detail. The Large size will show more of the model (the horizon is further out) but may result in too slow a refresh. Experiment to see which setting works best with your hardware.
Horizon View controls how much of the surrounding scenery is rendered. Experiment to see which setting works best with your hardware.
The Sky color of the screen around the model. When printing, this is always white.
You may get a message saying "No elevation data at this location", in which case you need to load the appropriate elevation data file with the Maps / Elevation... menu command. Elevation data files have the extension ".qed" and are included with Memory-Map branded map products. If you are using other cartography, please contact Memory-Map or your digital map publisher to obtain elevation data.
If you get an error message, or if the 3D model fails to appear, try the following (in this order):
Ensure you have installed the driver for your graphics card. Check that you have the latest version.
Ensure you have the latest version of Microsoft DirectX installed (click here).
Change the map size setting to "Small".
Resize the 3D World window to occupy a smaller area of the screen.
If you find the mouse wheel adjusts the scrollbar instead of zooming, it is necessary to disable the "auto-scroll" feature of your mouse driver. Click Start / Settings / Control panel / Mouse. Each brand of driver is different, but there is usually a way to disable auto-scroll for specific applications.
Under Windows Vista, you may find that the Video output and Printing both result in a blank screen, or a blank sheet of paper. In this case, the easiest work-around is to set you system display to 16-bit color format.